High Protein Chocolate Peanut Butter Easter Eggs (No-Bake)
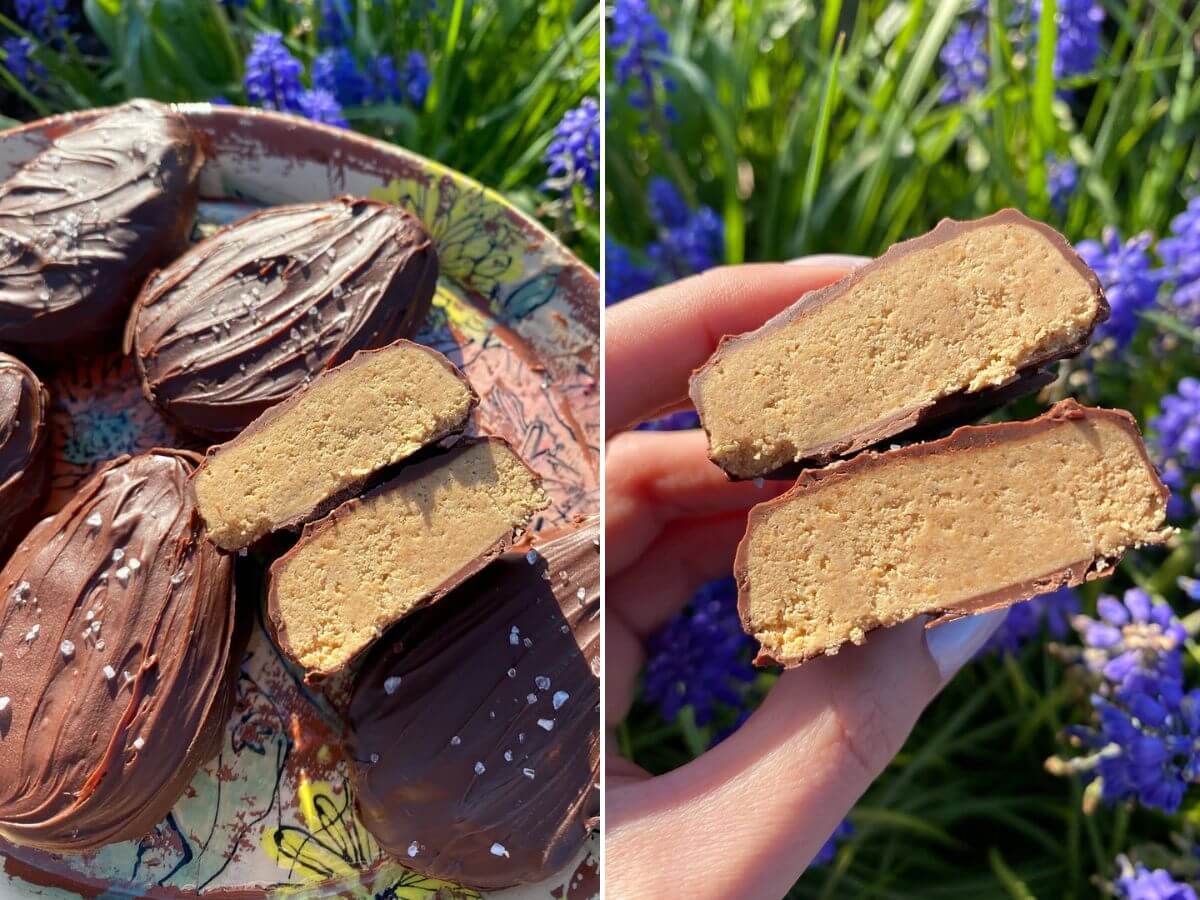
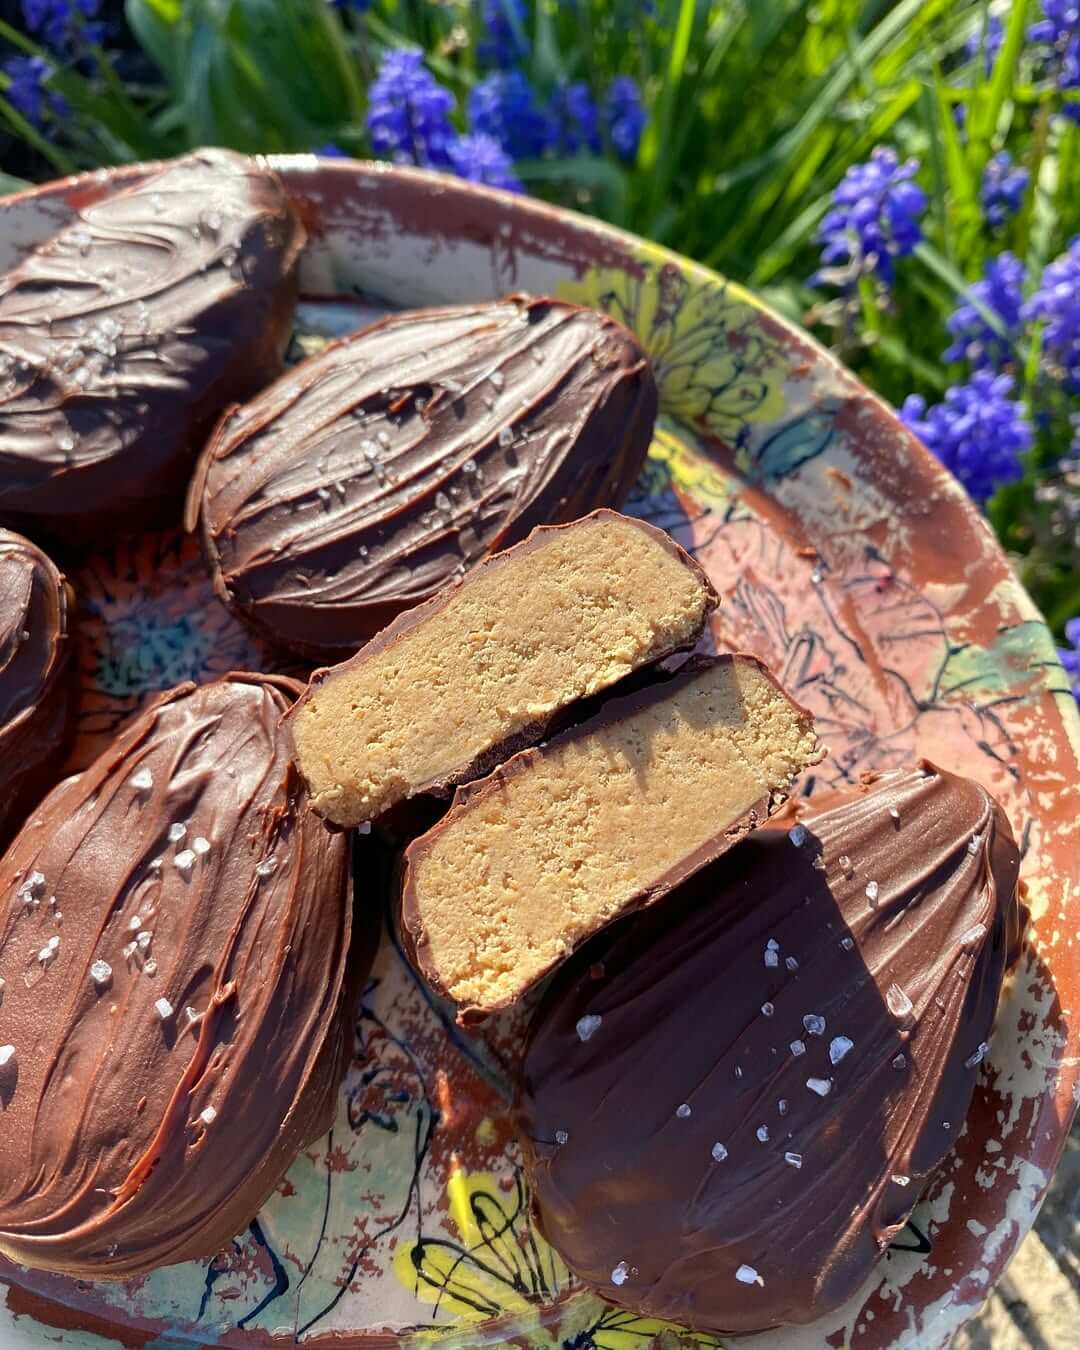
High protein chocolate peanut butter Easter eggs are a homemade take on a familiar seasonal treat, shaped like the candy we grew up with but made in a way that fits everyday snacking. These no-bake eggs pair creamy peanut butter with vanilla protein powder and maple syrup, then wrap everything in a smooth chocolate shell that sets firm with a quick chill.
What makes this recipe special is how closely it mirrors that classic Easter candy experience. The center is dense, smooth, and softly sweet, with a rich peanut butter flavor that feels comforting and familiar. The chocolate coating adds contrast, cracking gently as you bite in before melting into the filling. The texture lands somewhere between fudge and soft candy, which makes each piece feel satisfying without being heavy.
This approach follows the same method used in many no-bake peanut butter candies, where the filling is shaped first, chilled, and then coated to create structure without baking. Sally’s Baking Addiction shows that chilling peanut butter fillings before dipping helps them firm up and hold their shape during chocolate coating, which is why this method works so smoothly here.
Instead of relying on baking or specialty tools, this recipe keeps things simple. A bowl, a spoon, and a little patience in the fridge do most of the work. The result looks festive enough for Easter baskets or dessert plates, yet practical enough to keep on hand for quick snacks throughout the week.
These eggs also shine because they’re easy to adjust. We control the sweetness, the size, and the thickness of the chocolate shell, which makes them feel personal rather than mass-produced. That flexibility is part of why versions of this recipe keep showing up every spring.
Common Challenges and Troubleshooting
Even straightforward no-bake treats can run into texture issues. One of the most common problems is a filling that feels dry or crumbly. Protein powder absorbs moisture quickly, so adding maple syrup gradually and mixing thoroughly helps the dough come together into a smooth, moldable consistency.
This balance shows up in many high-protein no-bake desserts. Ambitious Kitchen shows that protein powder helps no-bake peanut butter mixtures firm up, which is why controlling moisture is key to getting a filling that feels soft yet holds its shape.
A filling that feels too soft usually means the peanut butter was very loose or warm. A short chill firms it up and makes shaping much easier. If the mixture sticks to your hands, resting it in the fridge for ten to fifteen minutes makes a noticeable difference.
Chocolate can be another trouble spot. Overheating causes it to thicken or look streaky. Melting slowly and stirring often keeps it smooth. Adding a small amount of butter softens the chocolate, making it easier to coat the eggs evenly. King Arthur Baking points out that gentle heat and frequent stirring help chocolate melt smoothly without losing its shine, which leads to a cleaner finish once set.
If chocolate pools underneath the eggs, lifting each one briefly with a fork and letting excess drip away before setting keeps the coating neat.

Selecting the Right Ingredients
With a short ingredient list, quality matters. Peanut butter forms the base, so choosing a creamy option with a smooth texture helps everything blend evenly. Natural peanut butter works well as long as it’s fully stirred to avoid oily separation.
Protein powder provides structure. Vanilla protein powder blends cleanly with peanut butter and maple syrup, creating a filling that tastes dessert-forward rather than powdery. Since sweetness varies by brand, tasting as you mix helps guide how much maple syrup to add.
Maple syrup brings gentle sweetness and moisture. It binds the filling and balances the savory notes of the peanut butter without overpowering it.
Semi-sweet chocolate keeps the eggs balanced and pairs naturally with peanut butter. Butter softens the chocolate slightly, creating a shell that’s easier to bite through once chilled. Flaky salt finishes the eggs with contrast and a light crunch.
Equipment Essentials
This recipe doesn’t require much. A medium mixing bowl and a sturdy spoon or spatula handle the filling with ease. Parchment paper prevents sticking during chilling and coating.
A baking sheet or large plate gives enough space for shaping. A microwave-safe bowl or small saucepan works for melting chocolate. A fork or dipping tool helps coat the eggs cleanly and lets excess chocolate drip away before setting.
A refrigerator and freezer do the rest of the work, firming the filling and setting the chocolate.
Preparation and Strategy
Before starting, having everything measured keeps the process smooth. Mixing the filling thoroughly prevents dry pockets and cracking later. Shaping the eggs before chilling helps them set evenly.
Chilling the eggs before dipping makes coating easier and keeps the filling from softening in warm chocolate. This mirrors classic no-bake peanut butter egg methods, where a cold filling leads to cleaner edges and even shells.
Melting the chocolate while the eggs chill saves time and keeps the workflow relaxed. Once dipped, sprinkling flaky salt while the chocolate is still wet ensures it sticks. A short freeze locks everything in place and gives the eggs a clean finish.
Flavor and Texture Enhancements
These eggs welcome small changes. A pinch of cinnamon adds warmth. A splash of vanilla extract deepens the filling. Crunchy peanut butter adds texture if you prefer a bit of bite.
Double-dipping creates a thicker chocolate shell. Keeping the coating thin gives a softer, quicker bite.
Substitutions and Dietary Options
Almond butter or sunflower seed butter can replace peanut butter. Chocolate protein powder changes the filling flavor while keeping the structure intact.
Dark chocolate deepens the cocoa flavor. Dairy-free chocolate and plant-based protein powder keep the recipe dairy-free.
Ingredients
Peanut Butter Filling
- ¾ cup peanut butter (180 g)
- ¾ cup vanilla protein powder (about 70 g)
- 2–3 Tbsp maple syrup (30–45 ml), to taste
Chocolate Coating
- ¾ cup semi-sweet chocolate chips or chopped chocolate (130 g)
- 1 tsp butter (5 g)
- Flaky salt, to finish
Instructions
- In a medium bowl, mix peanut butter and protein powder until combined and thick.
- Add maple syrup and stir until the mixture becomes smooth and holds together easily.
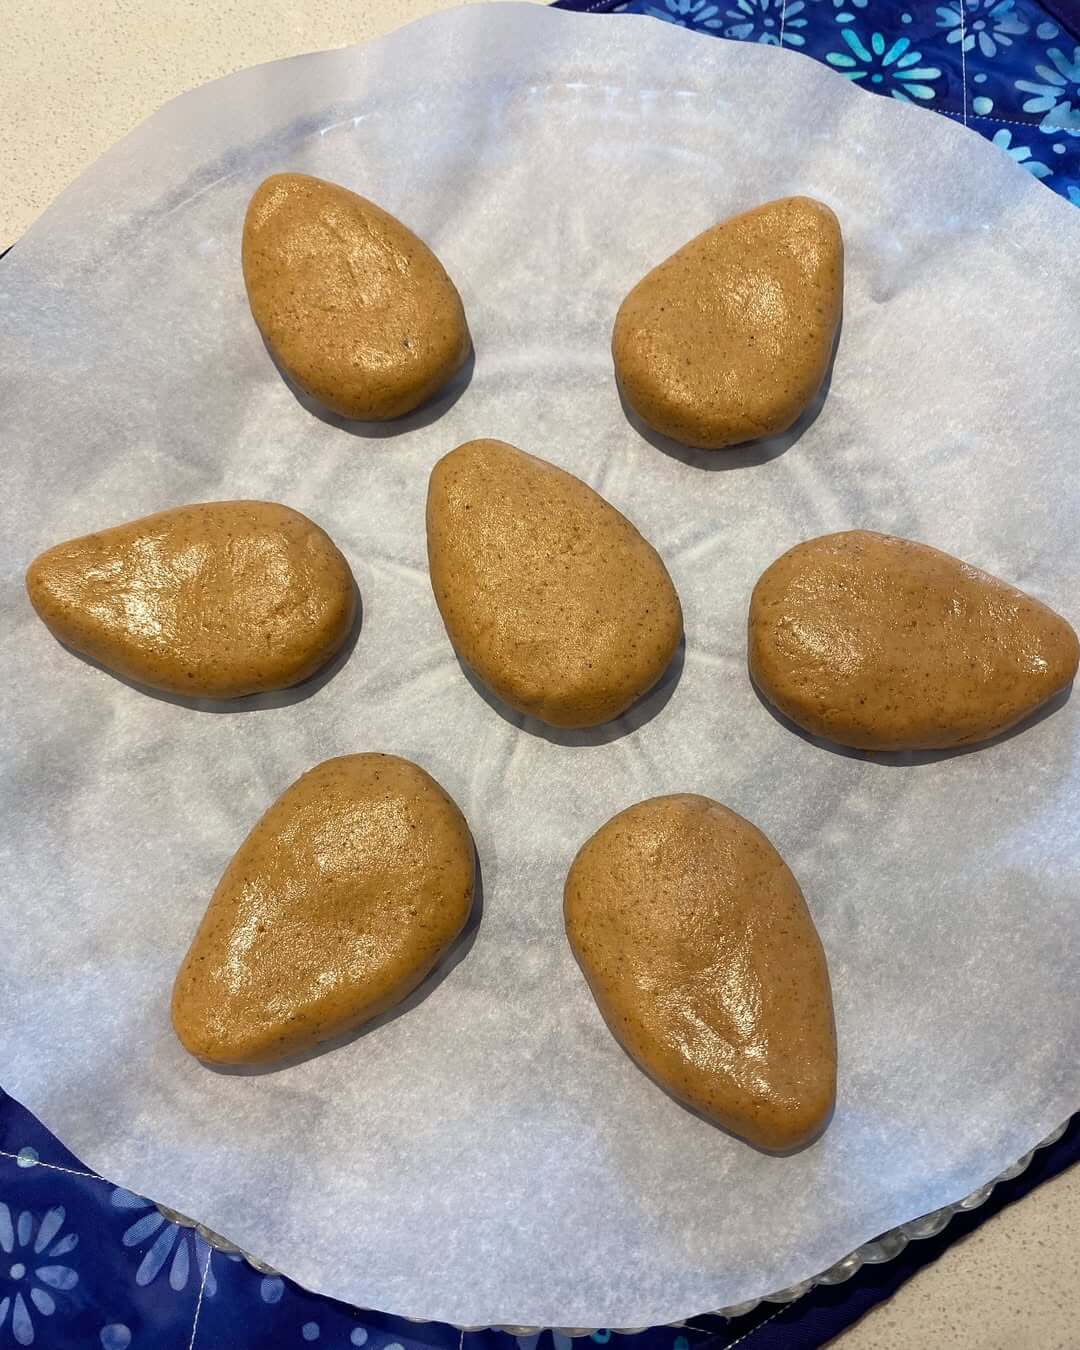
- Shape the mixture into egg shapes and place on a parchment-lined plate.
- Chill in the fridge for about 1 hour, until firm to the touch.
- Melt chocolate and butter together in short microwave intervals, stirring until smooth and glossy.
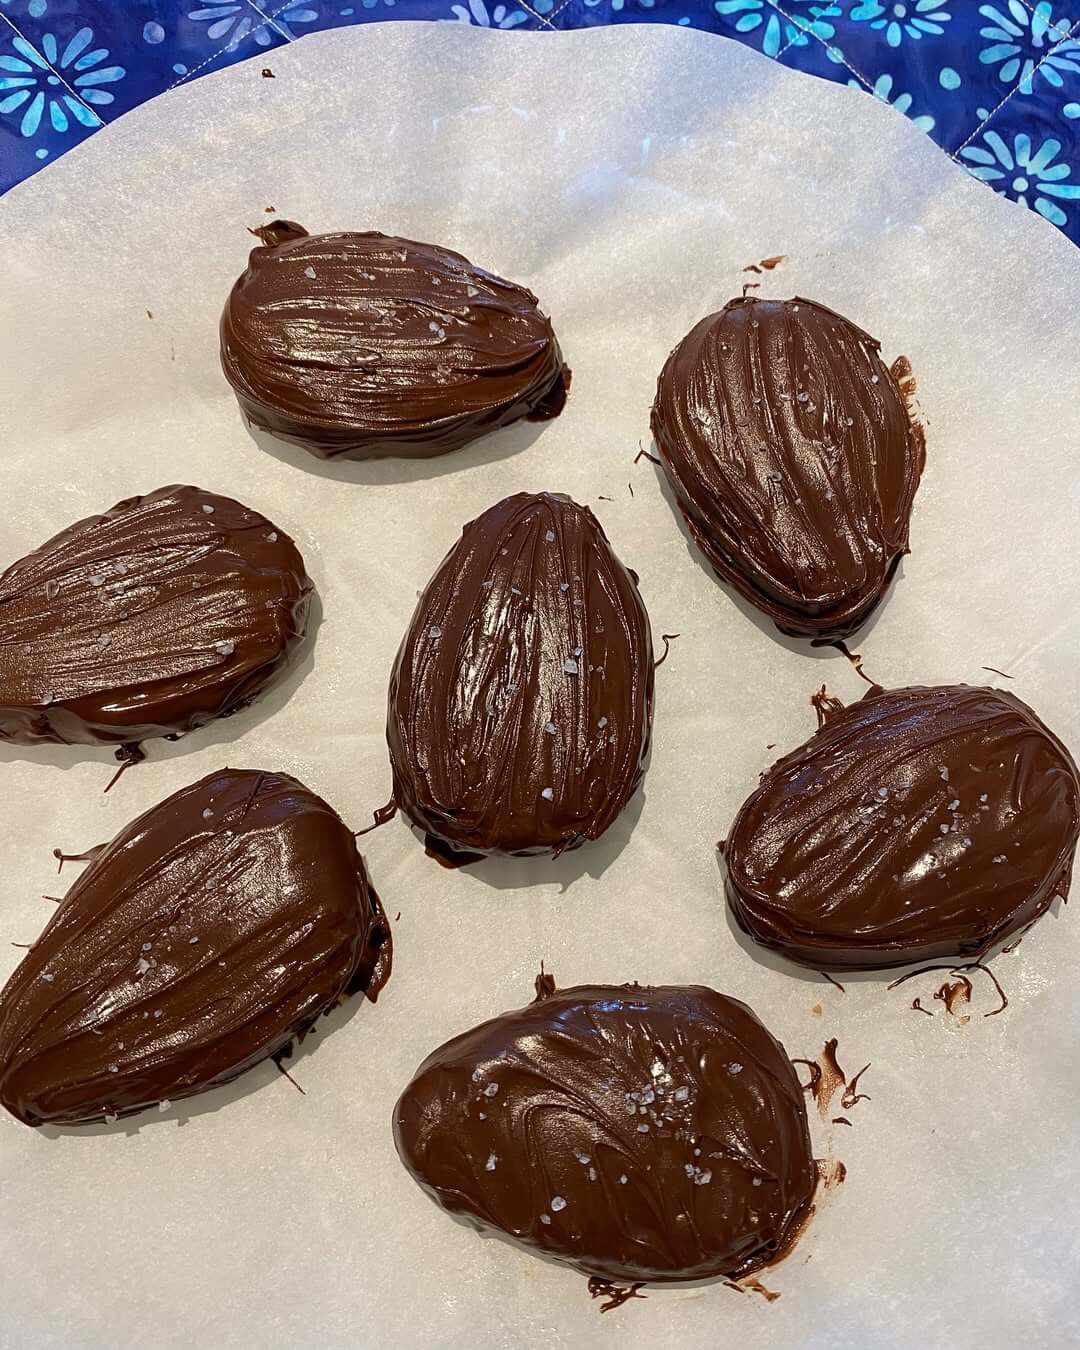
- Dip each chilled egg into the chocolate, coating fully and letting excess drip off.
- Place back on parchment and sprinkle lightly with flaky salt.
- Freeze for about 30 minutes, until the chocolate sets.
FAQs About High Protein Chocolate Peanut Butter Easter Eggs
Do these need baking?
No, they set fully in the fridge and freezer.
Can I skip the protein powder?
The texture depends on it, though powdered peanut butter can work with adjustments.
How sweet are they?
Sweetness depends on the protein powder and maple syrup amount.
Can kids eat these?
Yes, though checking protein powder ingredients is a good idea.
Troubleshooting Tips
- Filling too dry: Add a small splash of maple syrup.
- Filling too soft: Chill longer before shaping.
- Chocolate too thick: Warm gently and stir until smooth.
- Uneven coating: Let excess chocolate drip off fully.
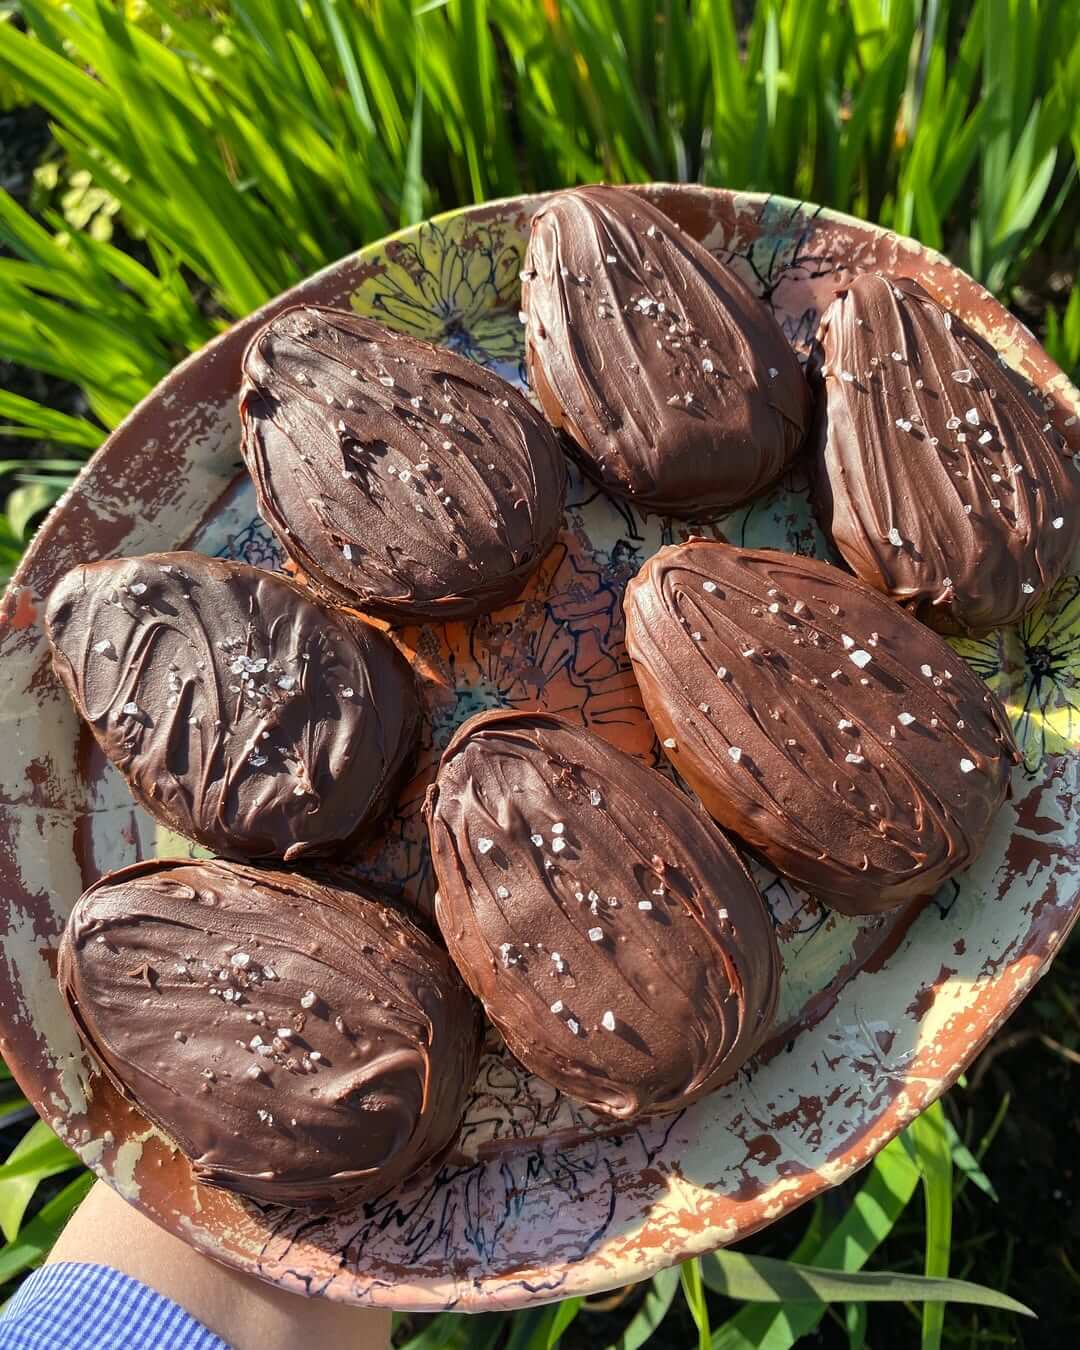
Serving Suggestions
Arrange these eggs on a spring platter, tuck them into Easter baskets, or serve alongside fruit and coffee. They also work well as homemade gifts when wrapped individually.
Variations and Comparisons
Compared to classic peanut butter cups, these eggs feel denser and more filling. Rolling the filling into balls creates bite-sized treats. White chocolate shifts both appearance and sweetness.
Storage and Reheating Instructions
Store in an airtight container in the fridge for up to one week or in the freezer for up to one month. No reheating needed. Let frozen eggs rest a few minutes before eating for the best texture.
RELATED