Easy Pumpkin Sourdough Bread With a Cozy Fall Flavor
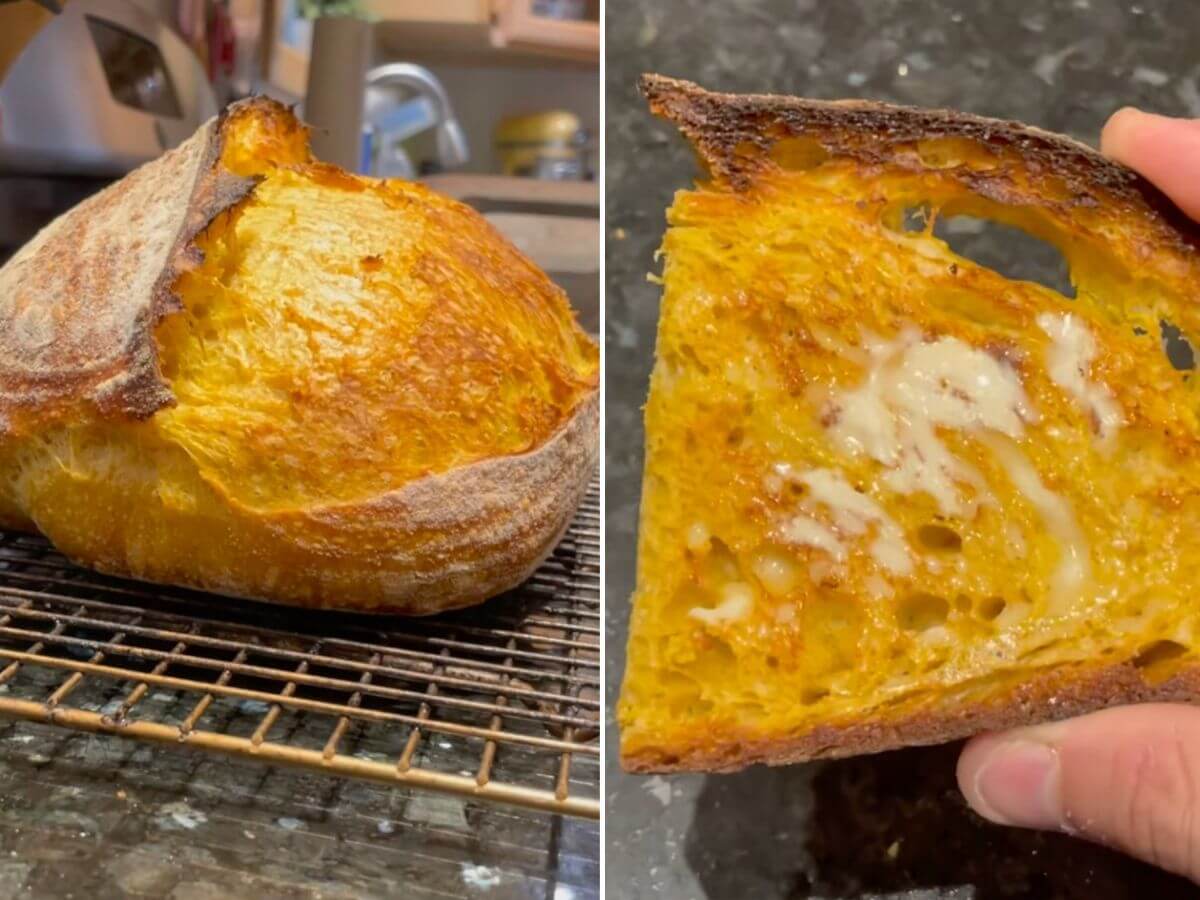
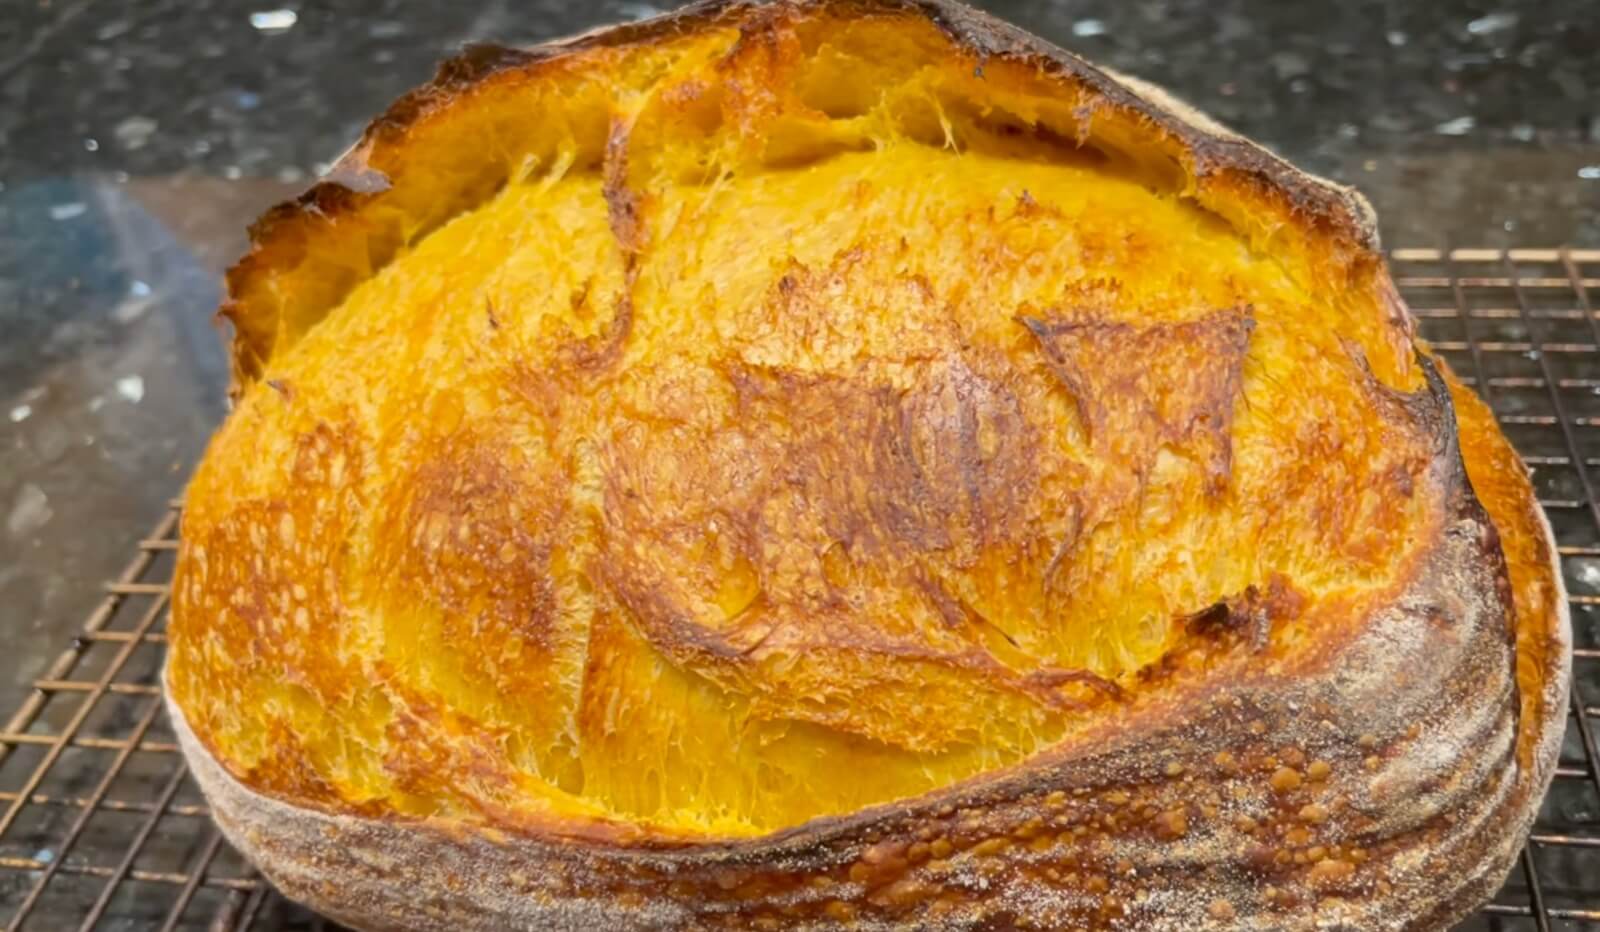
There’s something about pulling an orange-gold loaf of sourdough from the oven that immediately feels like fall.
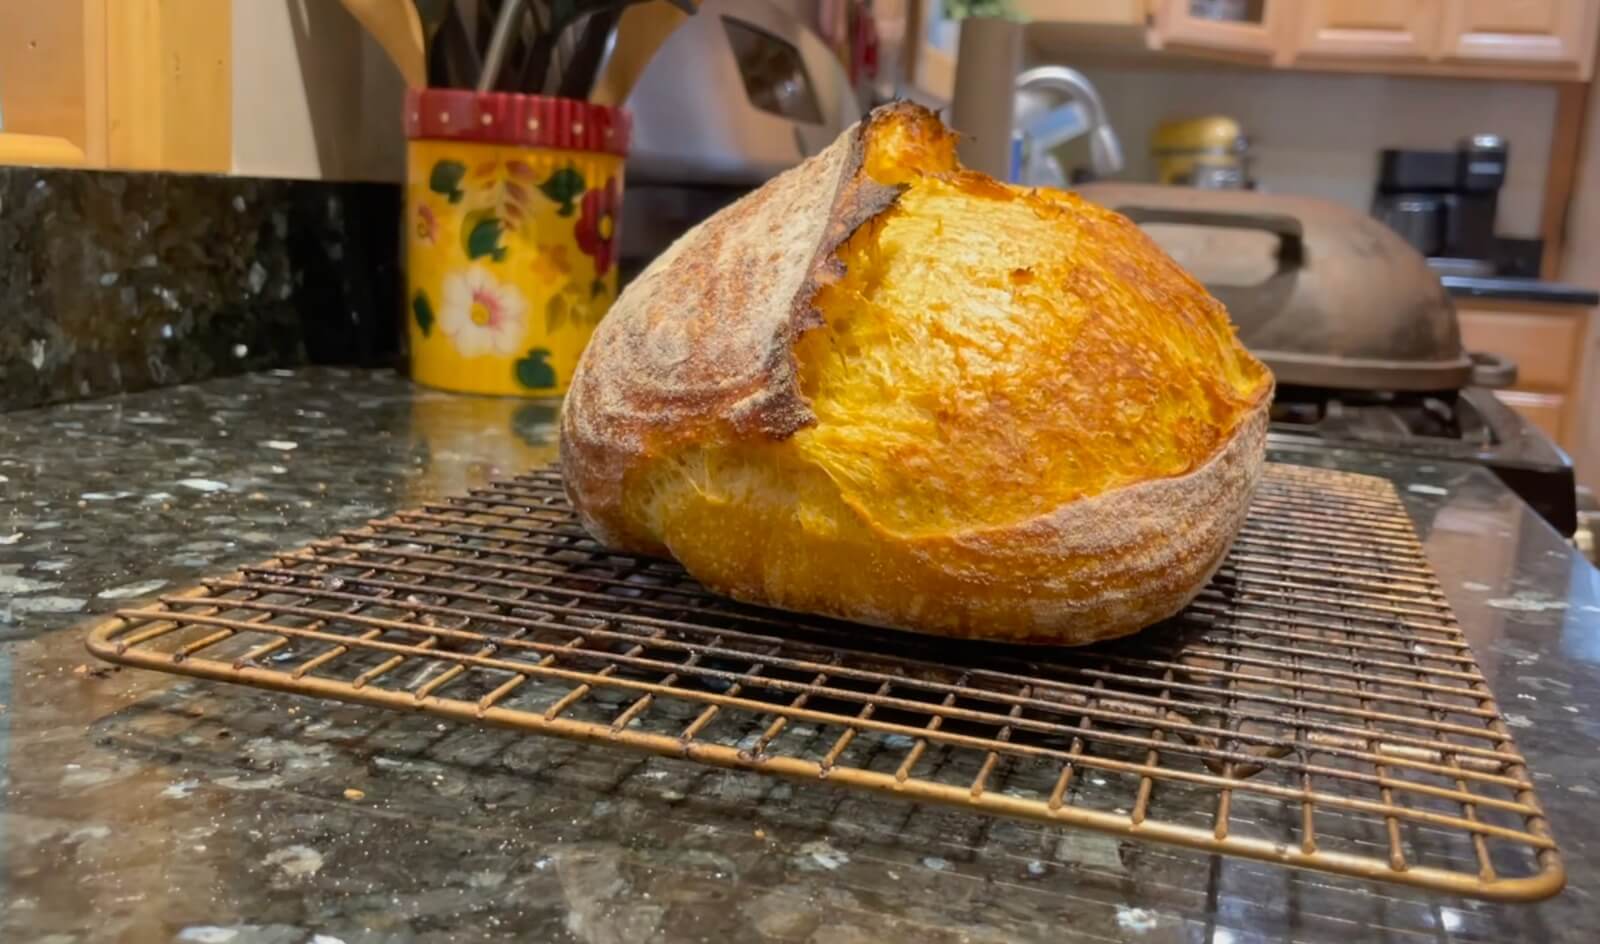
This pumpkin sourdough bread gets that color from real pumpkin purée mixed straight into the dough. It isn’t a sweet pumpkin bread or a loaf loaded with pumpkin pie spice. It’s still the chewy, crusty sourdough you know, just with a mild pumpkin flavor and a warm golden-orange crumb.
What surprised me most when making it was how much the pumpkin changed the feel of the dough. It starts softer and stickier than you might expect, but after resting and a few rounds of stretch and folds, it becomes smoother, stronger and much easier to handle.
That’s why I wouldn’t judge this loaf by the clock alone. Watch the dough instead. Look for it to become stretchy during the folds, puffy during the rise and fuller after shaping. If your pumpkin purée makes the dough wetter than mine, I’ll show you how I handle that without burying it in extra flour.
Once you know those cues, this becomes a manageable fall sourdough loaf, even if you’ve never put pumpkin in sourdough before. And when you finally slice through the crust, that orange crumb makes the wait worth it.
Why Pumpkin Sourdough Feels Different From Your Usual Loaf
If you already make sourdough, you may notice the difference as soon as you begin mixing.
The pumpkin purée becomes part of the wet mixture, and the dough may feel softer or stickier than the plain sourdough you’re used to. Pumpkin purées can also differ in consistency, which is why I pay attention to the dough in my bowl rather than trying to make it match a picture perfectly.
Then there’s the color.
The dough starts taking on a warm orange tone almost immediately. King Arthur Baking notes the same effect, writing, “The pumpkin purée does double duty — it also gives the bread a light orange hue, so it looks even more pumpkin-like.”
You’ll see that color again when you cut the finished loaf.
The bigger lesson at this stage is patience. If the dough feels a little sticky after mixing, don’t immediately reach for more flour. Give it its rest, work through the folds and see how much it changes first.
What You’ll Need
You only need a short ingredient list for one loaf:
- 250 grams water
- 10 grams salt
- 100 grams active sourdough starter
- 200 grams pumpkin purée
- 50 grams whole wheat flour
- 400 grams bread flour
- A little olive oil for the bulk-rise container
- Rice flour for the banneton
- A little bread flour for shaping
I want my starter visibly active before mixing. If it has clearly risen after feeding, I feel much better about asking it to raise an entire loaf.
The whole wheat flour gives the bread a slightly nuttier character that works nicely with pumpkin. If you don’t have whole wheat flour, use 450 grams of bread flour instead.
Before mixing, take five seconds to look at your pumpkin purée. That quick check can tell you what kind of dough you may be dealing with.
Before You Mix, Look at Your Pumpkin Purée
Is your pumpkin thick enough to sit heavily on a spoon, or does it look unusually loose?
Don’t change the recipe yet. Just remember what you saw.
I would rather mix everything and judge the actual dough than add flour simply because the pumpkin looked loose. The dough still has a 30-minute rest and three rounds of folds ahead of it, and its texture can change quite a bit during that time.
If it remains unusually wet after mixing, add flour in small amounts. If it is unusually dry and struggling to come together, add a small splash of water.
Small adjustments are much easier to manage than one large correction.
Now the pumpkin can go into the bowl.
Mix the Pumpkin Into the Dough
Add 250 grams of water to a mixing bowl, followed by the salt, active starter and pumpkin purée.
Stir until the pumpkin and starter are dispersed through the water. You should have a smooth orange mixture.
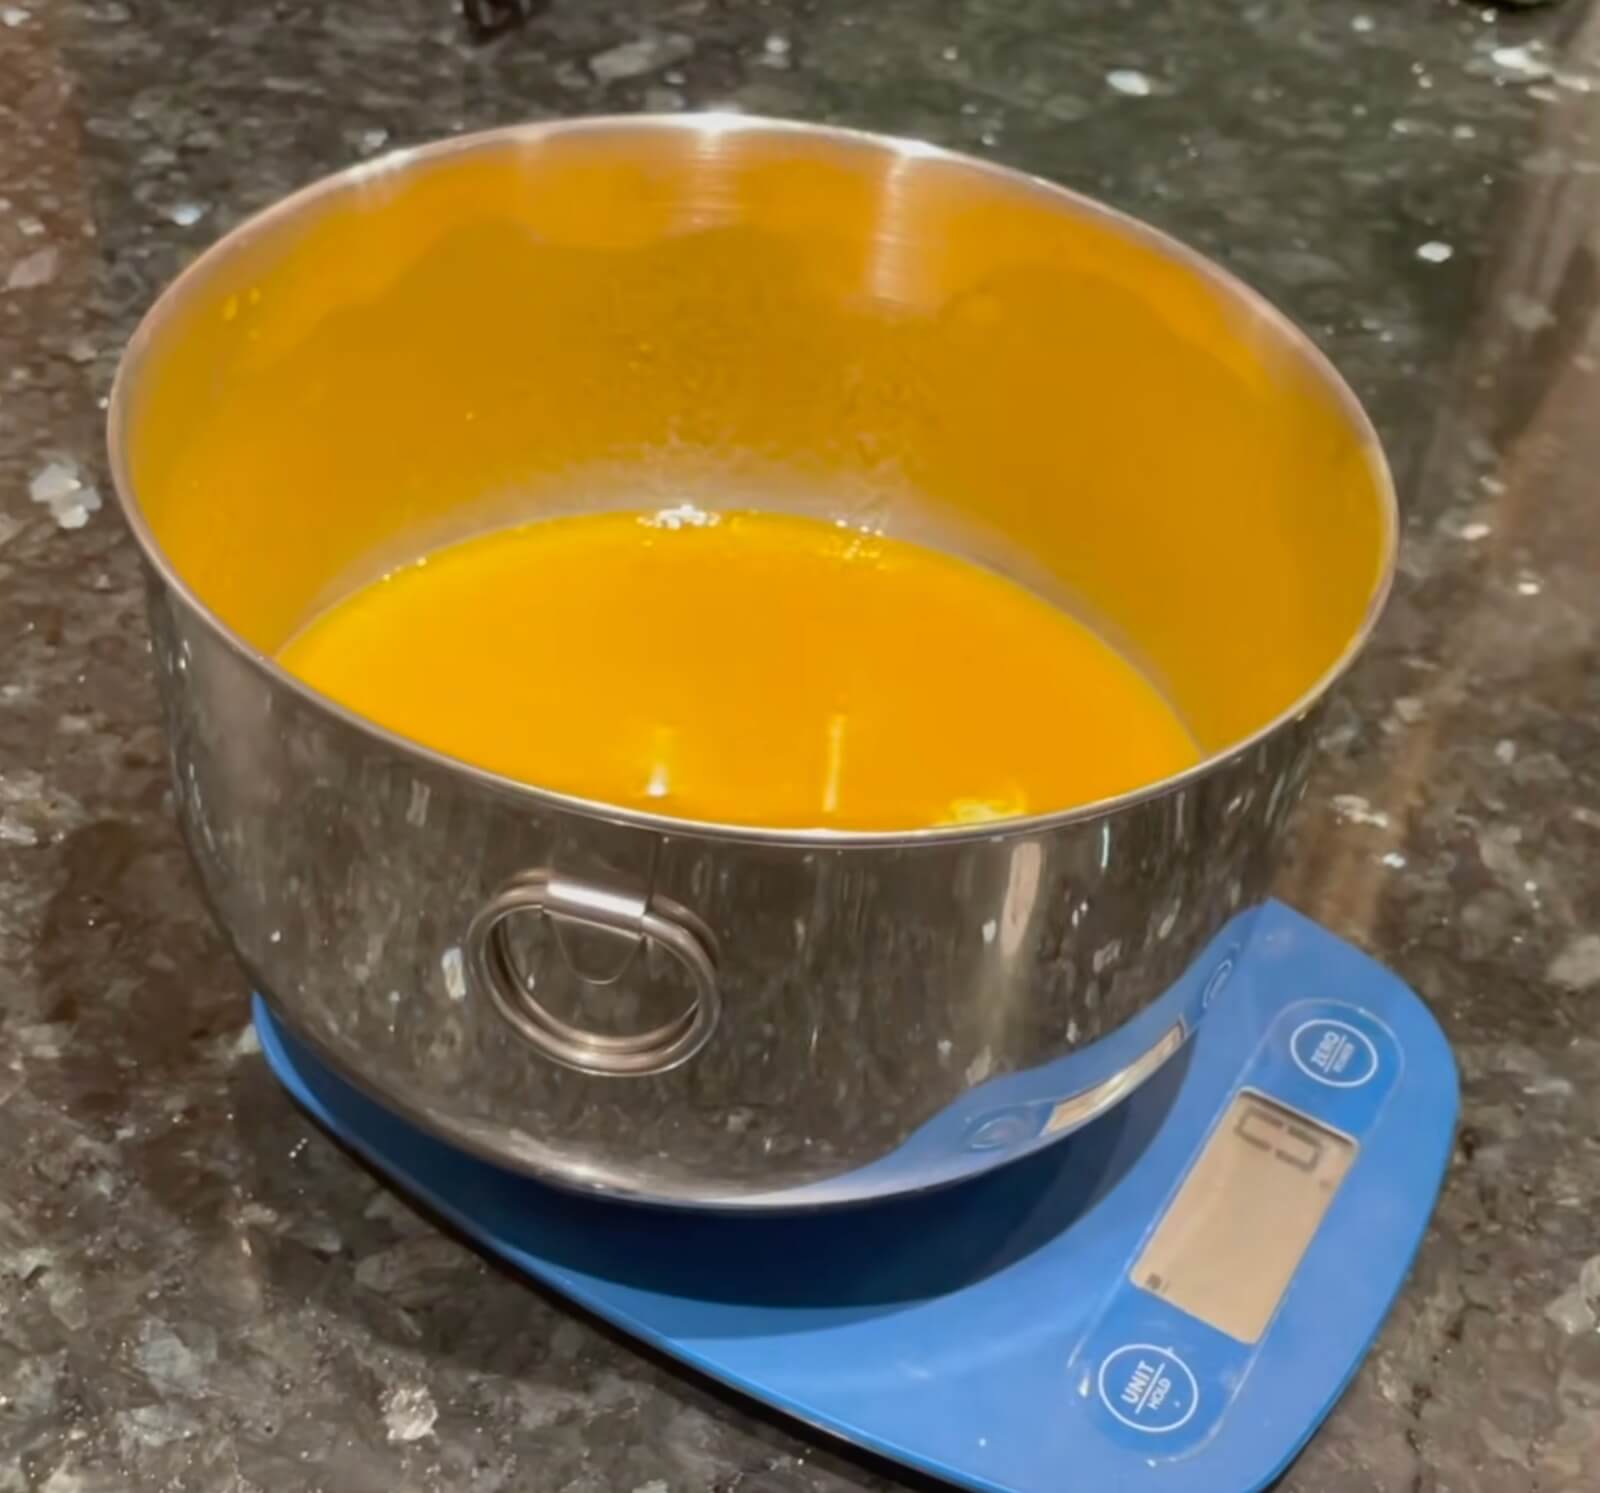
Add the whole wheat flour and bread flour. Mix until you no longer see obvious pockets of dry flour.
Don’t worry about making the dough smooth yet. At this stage, mine looks shaggy and somewhat untidy.
Cover the bowl and leave it alone for 30 minutes.
This is also why I don’t make a big flour adjustment the second the dough looks sticky. I want to see what it feels like after the rest before deciding it needs help.
Give the Dough 30 Minutes Before Judging It
The rough dough you see immediately after mixing isn’t what you’ll eventually shape.
I used to see rough dough and feel like I needed to fix it right away. Giving this one its scheduled rest makes it much easier to judge what the dough actually needs.
After 30 minutes, uncover the bowl and pull up one side of the dough.
This is where you can start feeling it change.
Stretch and Fold Until You Feel the Difference
Pull one side of the dough upward, fold it over itself, rotate the bowl and repeat.
During the first set, the dough may still feel loose. Keep working around the bowl until it begins pushing back against the stretch.
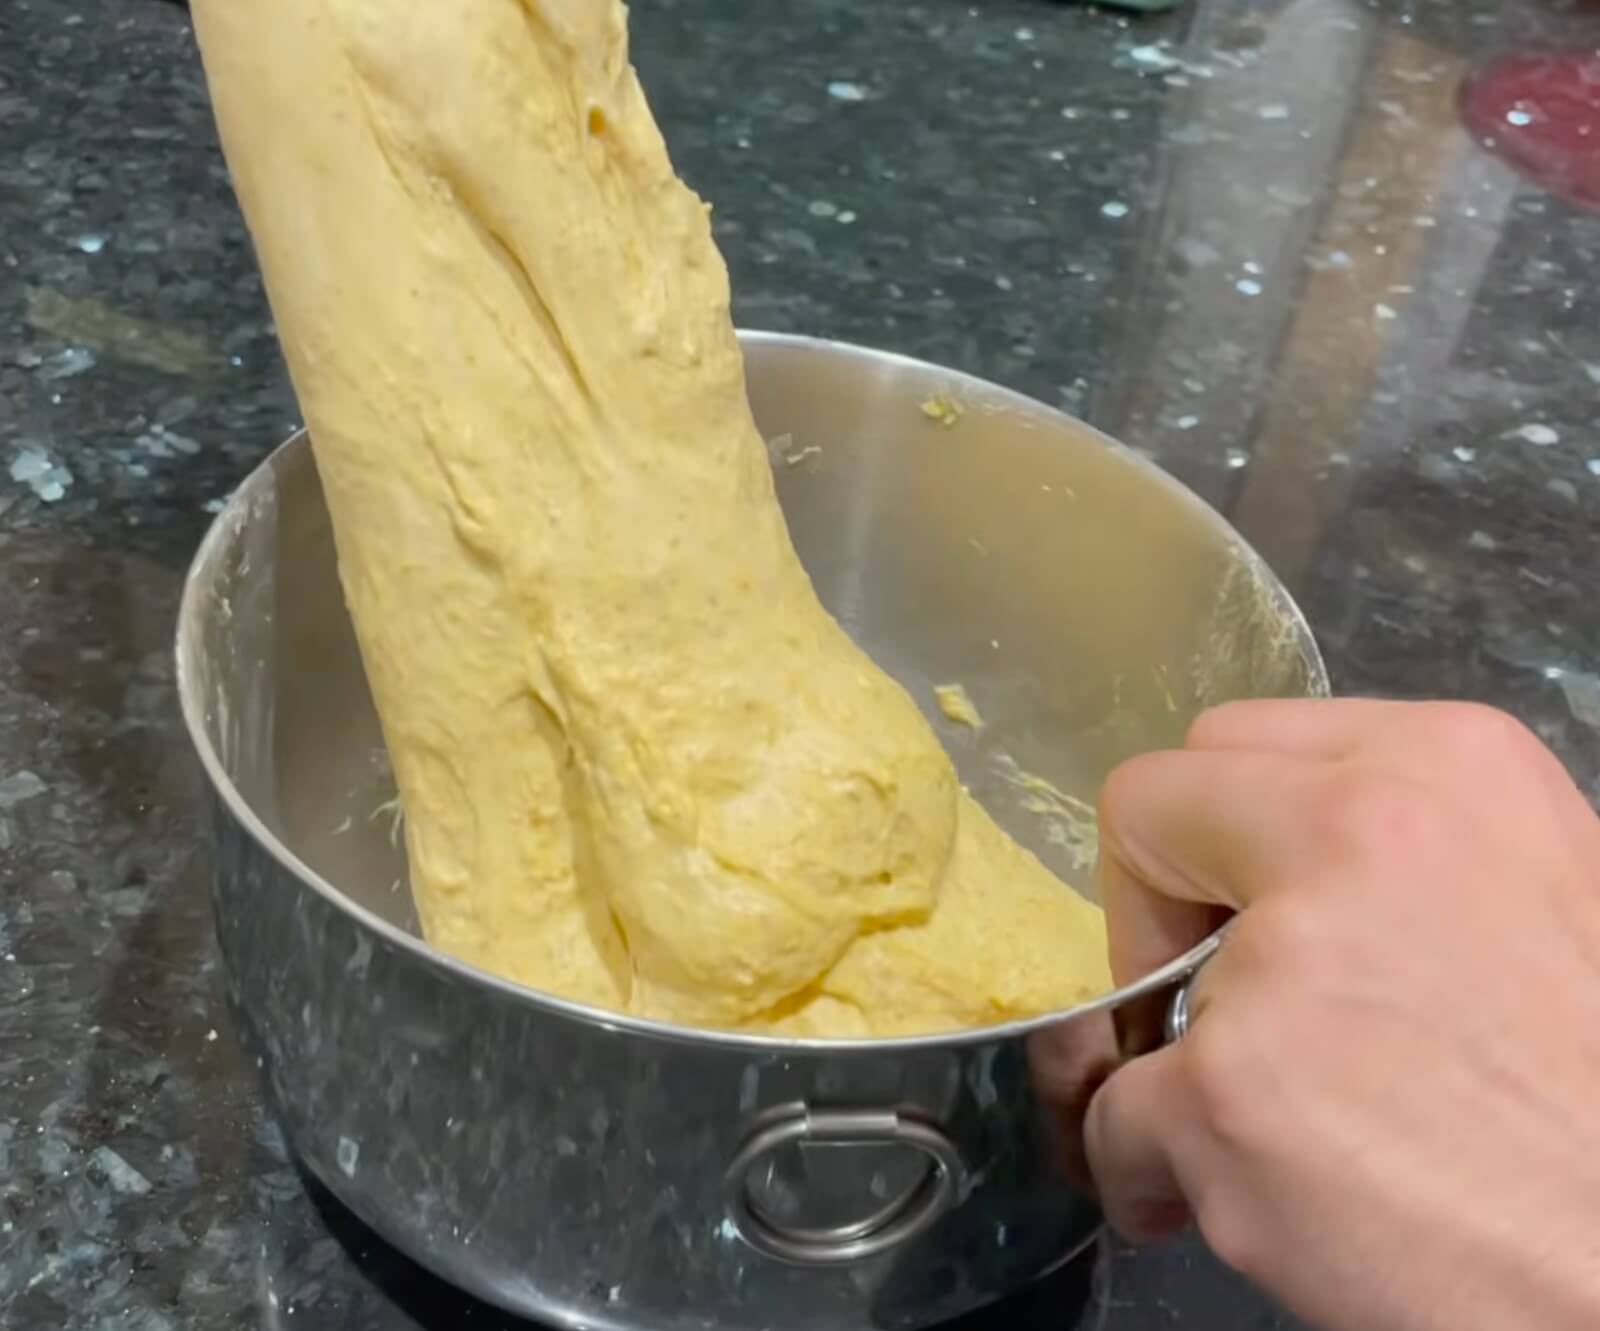
These folds aren’t busywork. The Clever Carrot explains, “This step, done during the bulk rise, helps to strengthen the gluten, improve structure, and give your loaf more height.”
Do three sets, resting the dough for about 30 minutes between them.
Here’s what I want you to notice rather than merely counting folds:
During the first set, the dough may feel loose and awkward.
By the second, it should stretch more smoothly.
By the third, it should feel stronger, smoother and more elastic.
When the dough starts resisting your pull, stop. You don’t need to keep stretching simply because you planned to do a certain number.
After the third set, the hands-on work stops for a while.
Don’t Let the Clock Decide When Bulk Fermentation Is Done
Move the dough to a clean container lightly greased with olive oil and cover it.
Now let it rise until it is roughly 1 1/2 to 2 times its earlier size. Mine may take around five hours at room temperature, but I wouldn’t treat five hours as a deadline.
A clear container makes this much easier because you can compare the dough’s height from the side.
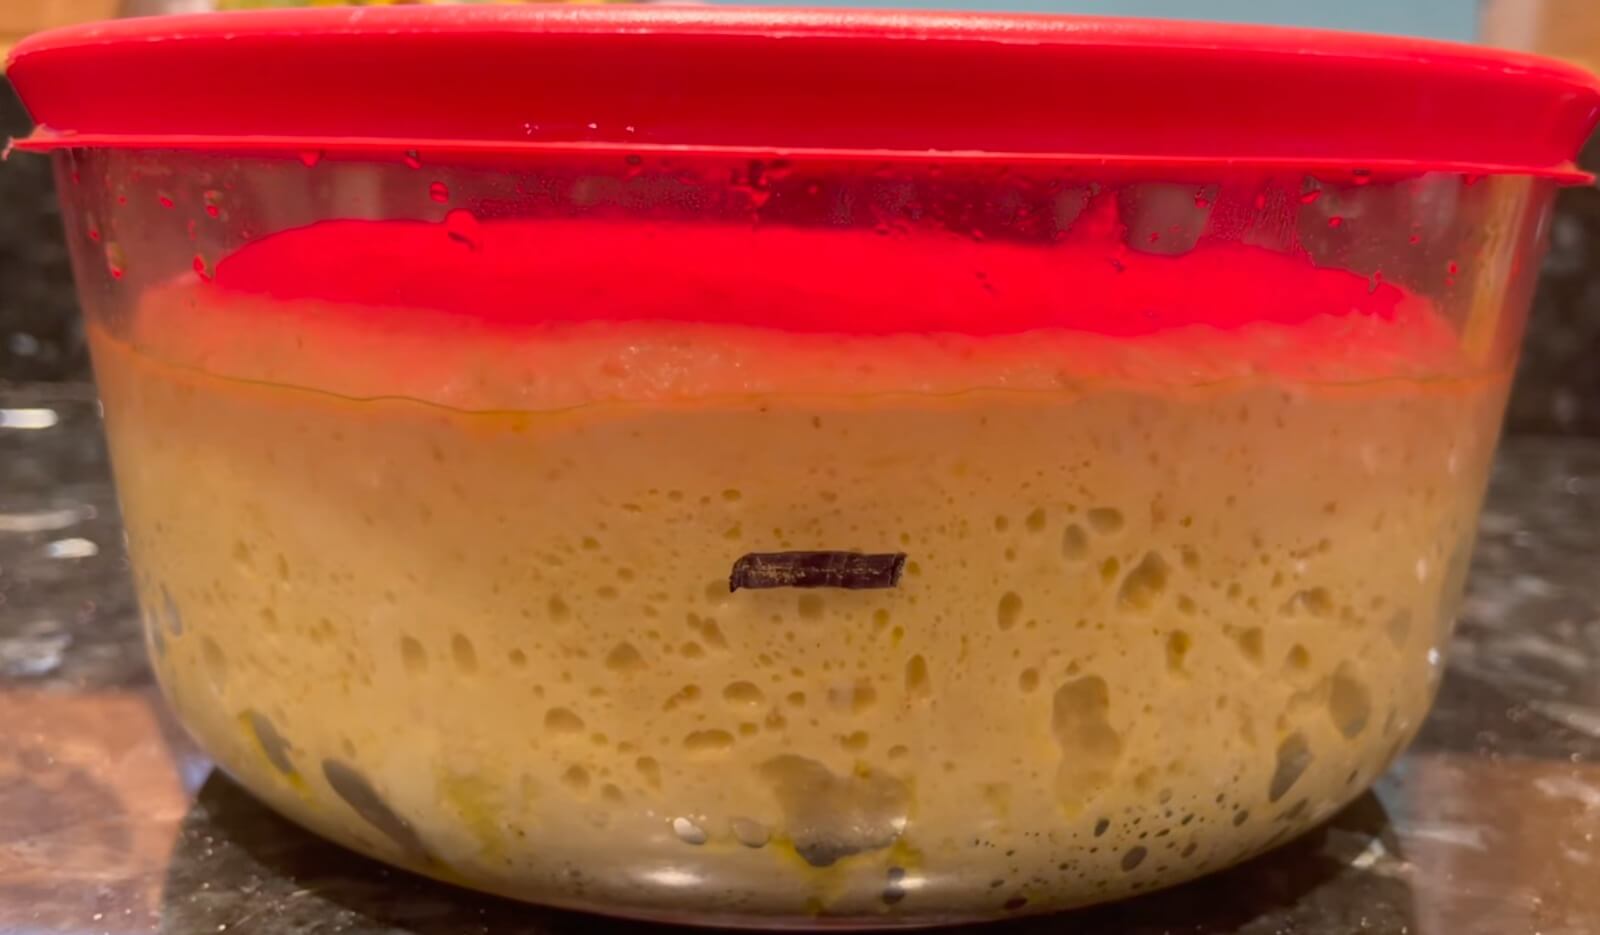
Look for a dough that has clearly grown and looks puffy rather than dense.
The Perfect Loaf gives a useful visual check: “The dough in the container should be puffy and jiggle when shaken gently.”
That’s the cue I’d remember.
If five hours pass and your dough has barely changed, don’t shape it simply because five hours are up. Give the dough more time.
Once it has grown, looks puffy and has some movement, you can turn it out for shaping.
Shape the Dough Without Squashing It
Turn the fermented dough onto a clean counter and gently bring it into a round with your hands or a bench scraper.
You’re trying to create tension across the outside while keeping some of the air you spent all that time building.
Let the pre-shaped dough rest for about 30 minutes.
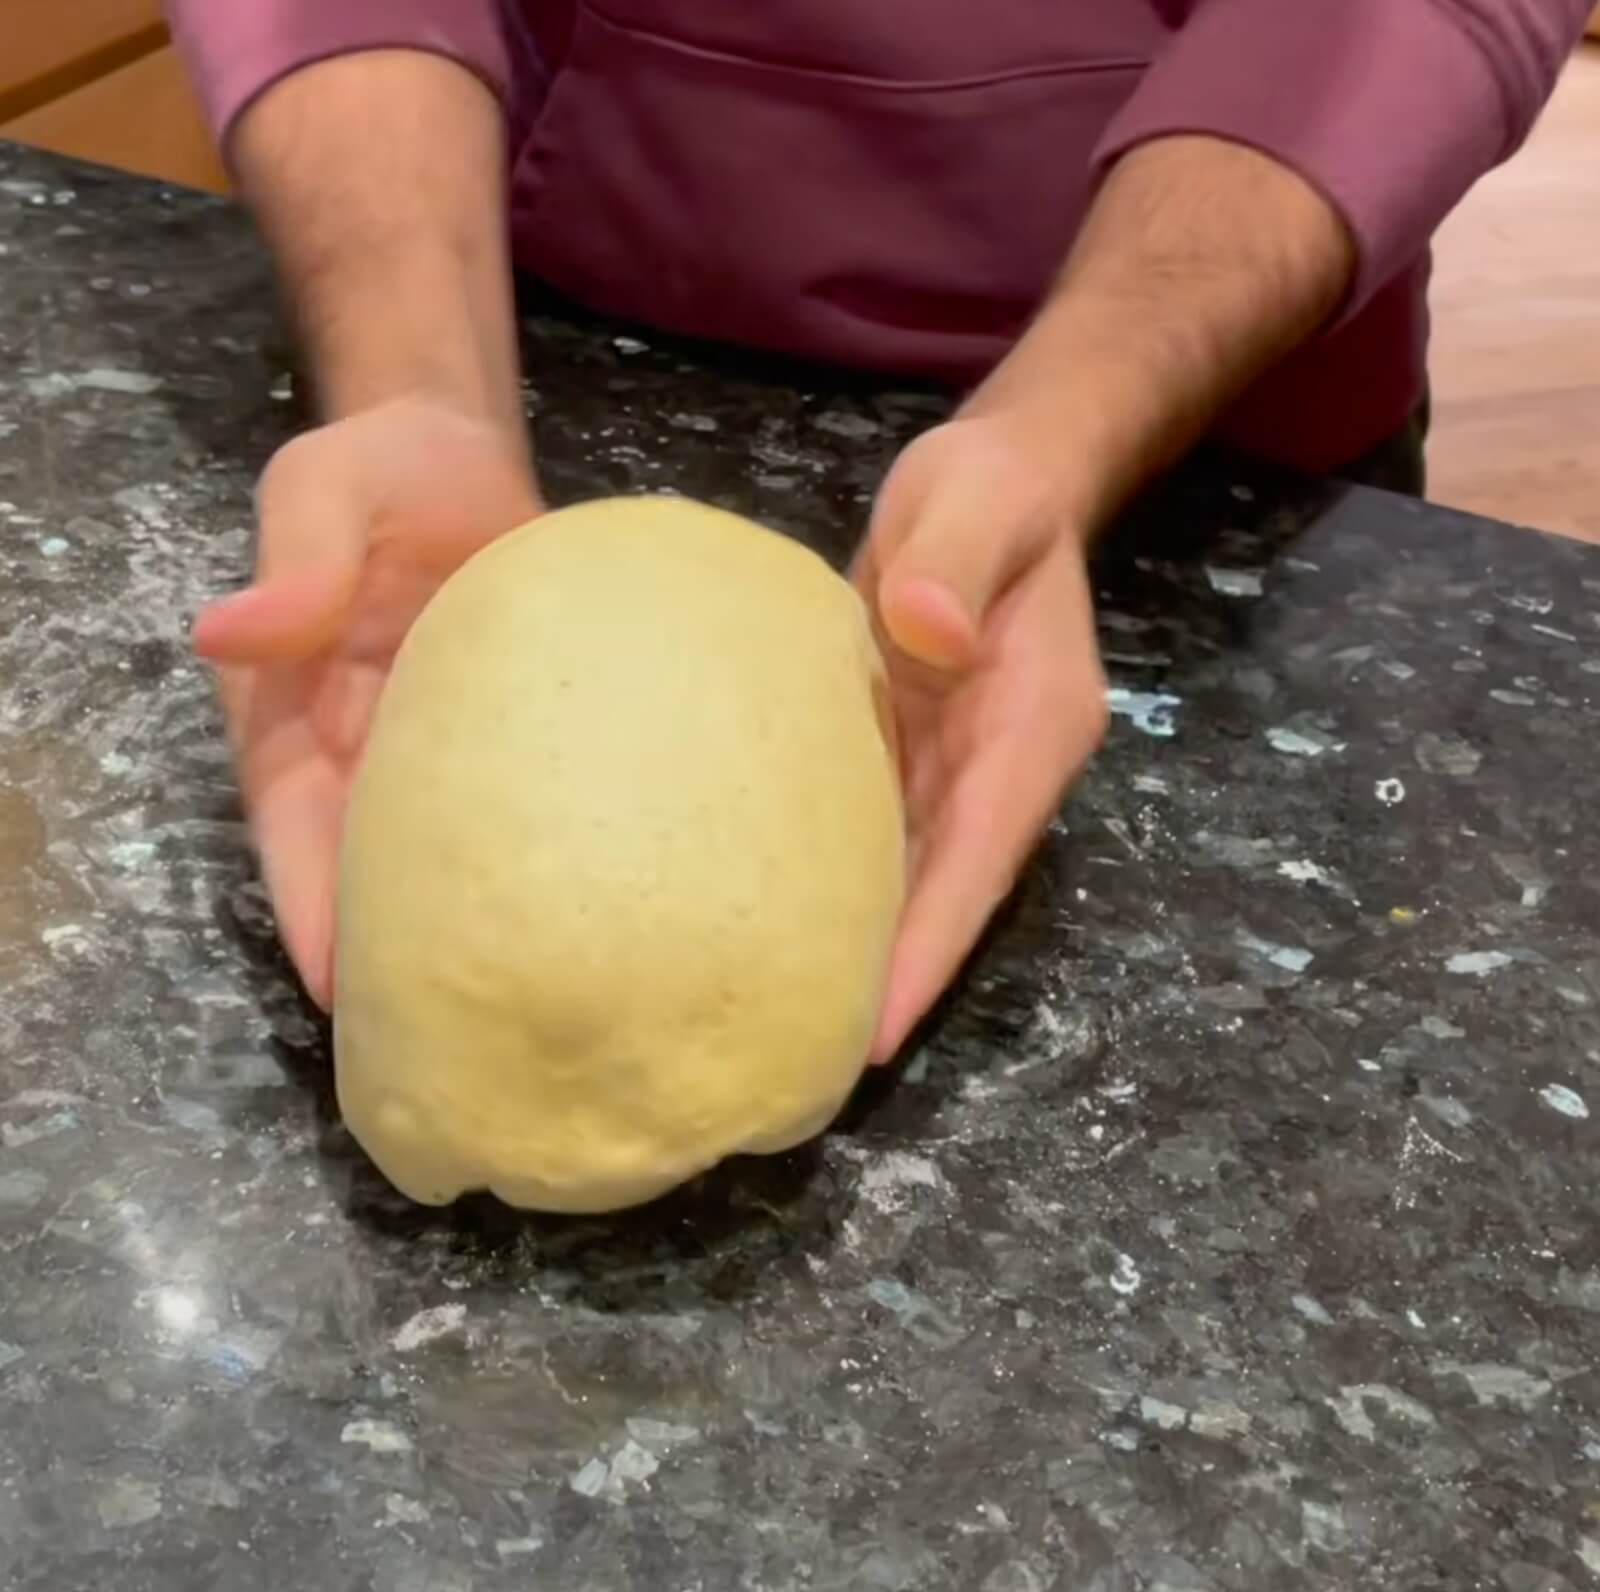
For the final shape, lightly flour the top and flip the dough over. Gently stretch it into a rough square.
Fold the right third toward the middle. Fold the left third toward the middle. Press the seam lightly, then roll the dough toward yourself into an oval.
If the ends stick out, tuck them underneath.
Place the loaf seam-side up in a banneton dusted with rice flour.
From here, you can decide whether bread is happening today or tomorrow.
Pick a Same-Day or Overnight Proof
This is one of my favorite parts of the recipe because it gives you some freedom with your schedule.
If you want bread the same day, cover the shaped loaf and leave it at room temperature. In the recipe this took about 2 1/2 hours, though your dough may move faster or slower.
If it’s getting late, put the covered banneton in the refrigerator and proof the loaf overnight instead.
I’d choose the overnight route on a busy day. You can finish shaping in the evening and return to the loaf the next day rather than waiting around for another stage.
For a room-temperature proof, look for the dough to appear fuller and jiggly before moving on.
Then heat the oven and get ready to score.
Score the Loaf With One Confident Cut
Turn the loaf onto a piece of parchment larger than the bread and brush away excess rice flour.
Hold a bread lame or clean razor at a shallow angle and make one long slash across the dough.
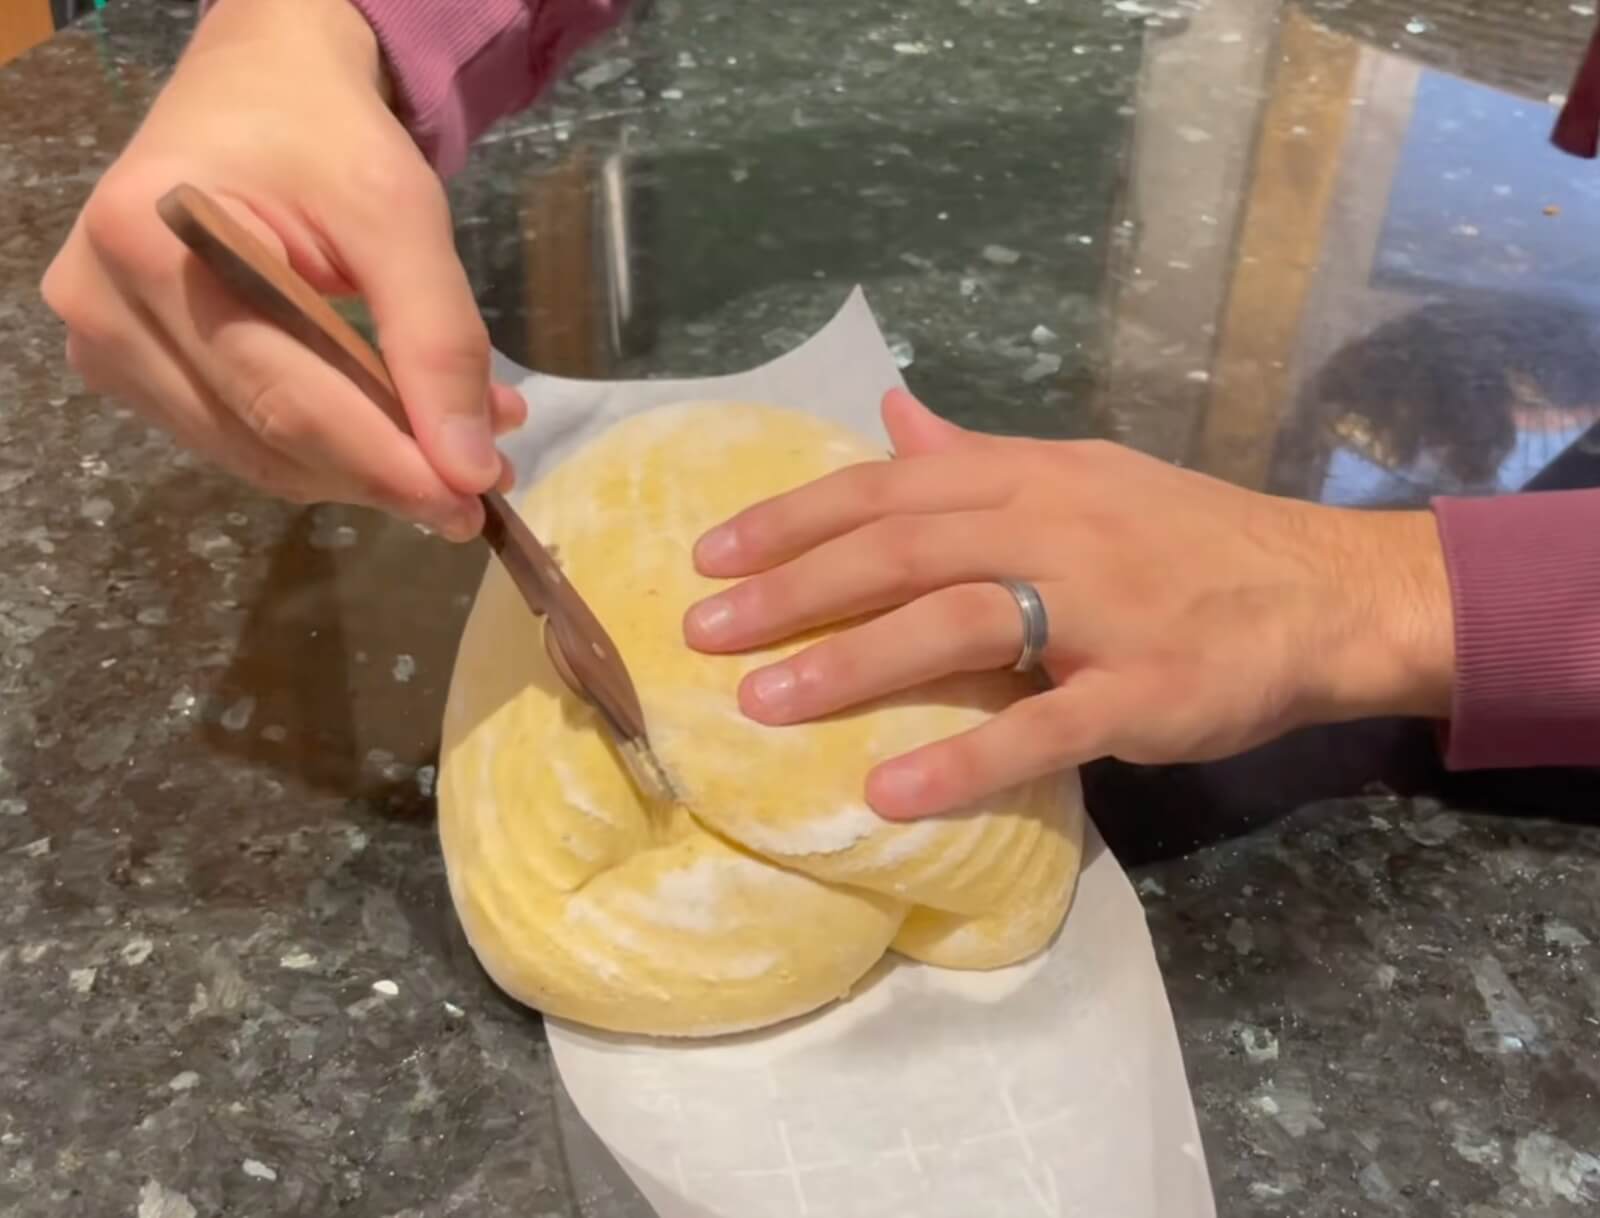
I’d rather make one confident cut than repeatedly saw at the surface.
You don’t need an elaborate pattern, either. The long score gives this loaf a clean artisan look and leaves plenty of room for the crust to open in the oven.
Now it’s ready for the Dutch oven.
Bake Until the Crust Is Golden Orange
Preheat your Dutch oven for 30 minutes at 500°F.
Carefully lower the bread into the hot Dutch oven using the parchment, cover it and bake for 20 minutes.
Remove the lid and take a look at the loaf. This is the moment when you get to see the oven spring and the opened score.
Bake uncovered for another 12 to 15 minutes at 500°F.
With this loaf, I don’t chase an extremely dark crust. I want enough browning for a good-looking crust while keeping some of that pumpkin-orange color visible.
Move the baked loaf onto a wire rack.
Then leave it there.
Let the Bread Cool Before You Slice It
This may be the least enjoyable instruction in the recipe.
Give the loaf about an hour to cool before cutting it.
Once the wait is over, slice through the crust.
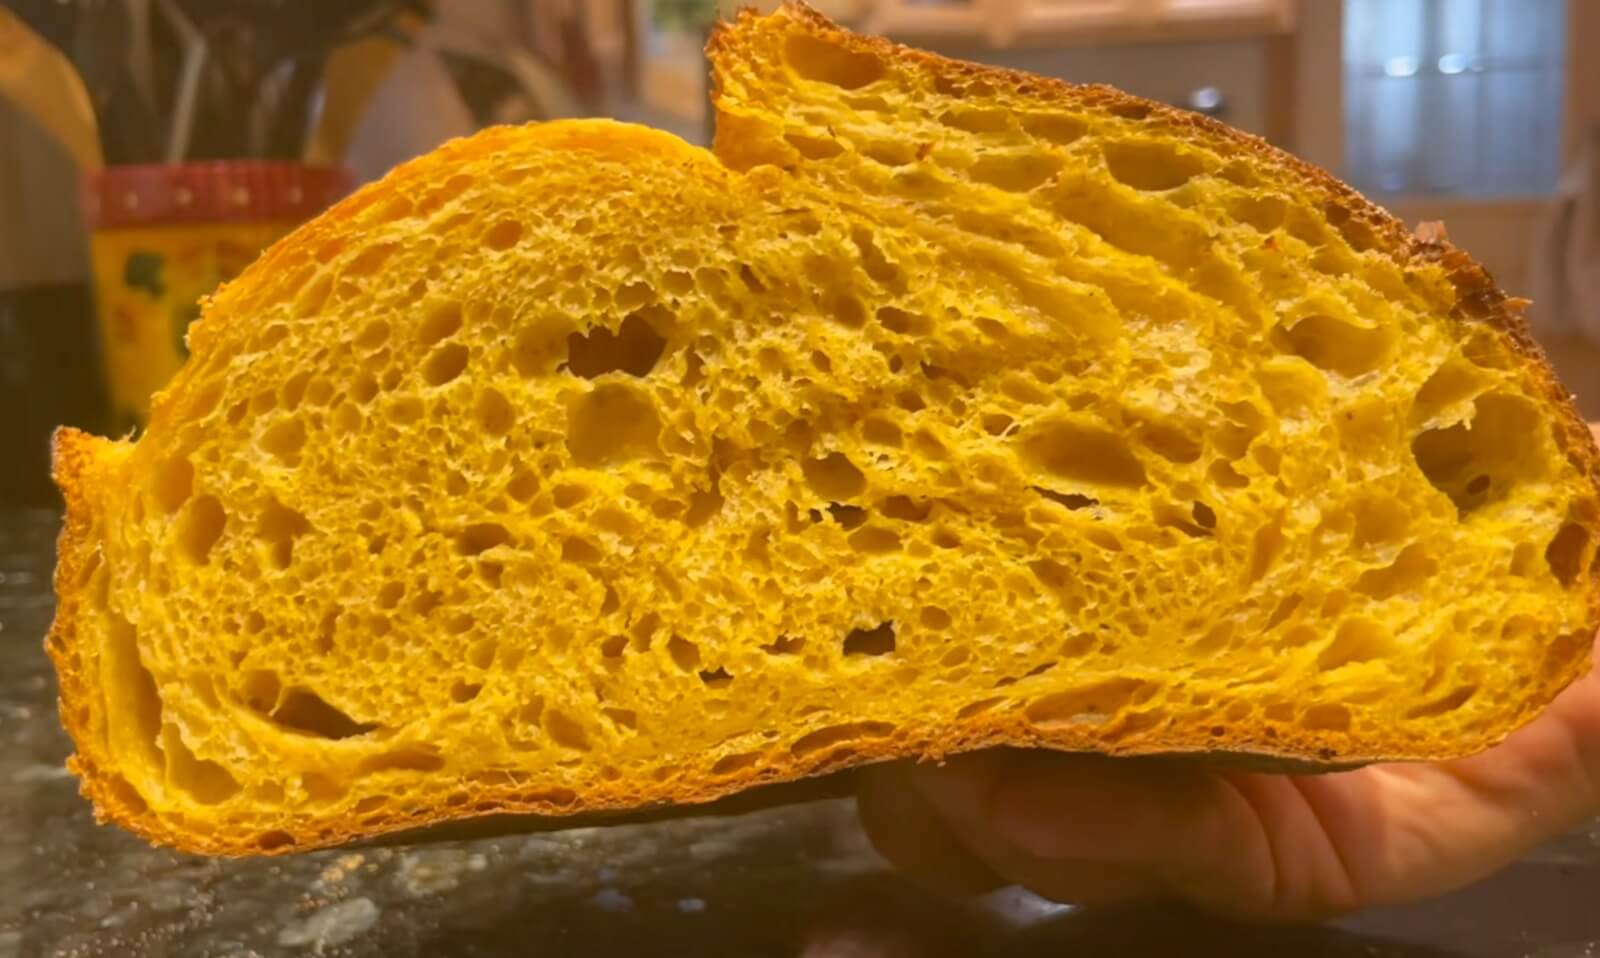
Inside, you should find a golden-orange crumb that is light and airy without enormous holes.
I actually like the smaller holes here. Butter and cream cheese stay on the bread instead of disappearing through the slice and landing on the plate.
If your crumb looks very different, don’t write the loaf off. Use it as a clue about what you might change next time.
What to Do If Your Dough Is Too Wet
Don’t dump a large amount of flour into it.
Give the dough its 30-minute rest first. Then complete the first set of folds and see whether it starts holding itself together.
Still extremely loose?
Add a small amount of flour, work it in and check the texture again.
If you make this bread a second time, remember what your pumpkin purée looked like. Comparing the purée and dough from one bake to the next can help you make smaller adjustments sooner.
What to Do If Your Dough Barely Rises
Look at the dough before looking at the timer.
If it has barely grown and still looks dense, give it more fermentation time.
Then think back to your starter. Was it visibly active after feeding, or did you mix the dough before the starter had really risen?
Temperature can change your timing too. If your kitchen is cooler on this bake, don’t expect the dough to follow the same schedule it followed on a warmer day.
The immediate move is simple: if the dough hasn’t shown the rise you’re looking for, wait rather than shaping it just because your planned time has arrived.
What to Do If the Dough Spreads During Shaping
A little spreading during pre-shaping doesn’t mean you’ve lost the loaf.
Use a bench scraper to pull the dough gently toward itself and build tension across the surface. Then give it the 30-minute bench rest before final shaping.
If it keeps turning into a loose puddle, think back to the folds and bulk rise.
Did the dough become stronger as you folded it? Did it visibly grow before shaping?
Those earlier stages can tell you more than another handful of flour will.
What to Check If Your Bread Is Dense
A dense loaf makes me look backward through the process.
Start with three questions.
Was the starter active before mixing?
Did the dough clearly increase in volume during bulk fermentation?
Did the shaped loaf become fuller before baking?
If the answer was no at one or more of those stages, that gives you somewhere to focus on the next bake.
I find this much more useful than simply leaving a dense loaf in the oven longer and hoping the crumb changes.
Canned or Homemade Pumpkin Purée
Either can work in this dough.
What matters to me while mixing is consistency.
If your homemade purée looks quite loose, keep that in mind when you see how the dough comes together. If your canned pumpkin is very thick, your dough may not look identical to someone else’s.
Don’t spend the afternoon trying to make your bowl look exactly like a photograph.
Feel how the dough changes through the folds. Watch how it rises. See how well it holds its shape.
Those are the clues sitting right in front of you.
How I Fit Pumpkin Sourdough Into My Day
Sourdough sounds like an all-day project until you notice how much of the day is simply waiting.
For a same-day loaf, I feed my starter, wait for it to become active, mix the dough, complete the folds, let it rise, shape, proof and bake.
I’m not standing beside the bowl for all those hours. The resting and rising periods are when I can get on with the rest of my day.
If I don’t want to bake that evening, I shape the loaf and use the overnight refrigerator proof.
That is the schedule I’d choose when I have a busy afternoon. Instead of forcing the bread to fit one long baking day, I split the work across two days.
How I’d Serve Pumpkin Sourdough
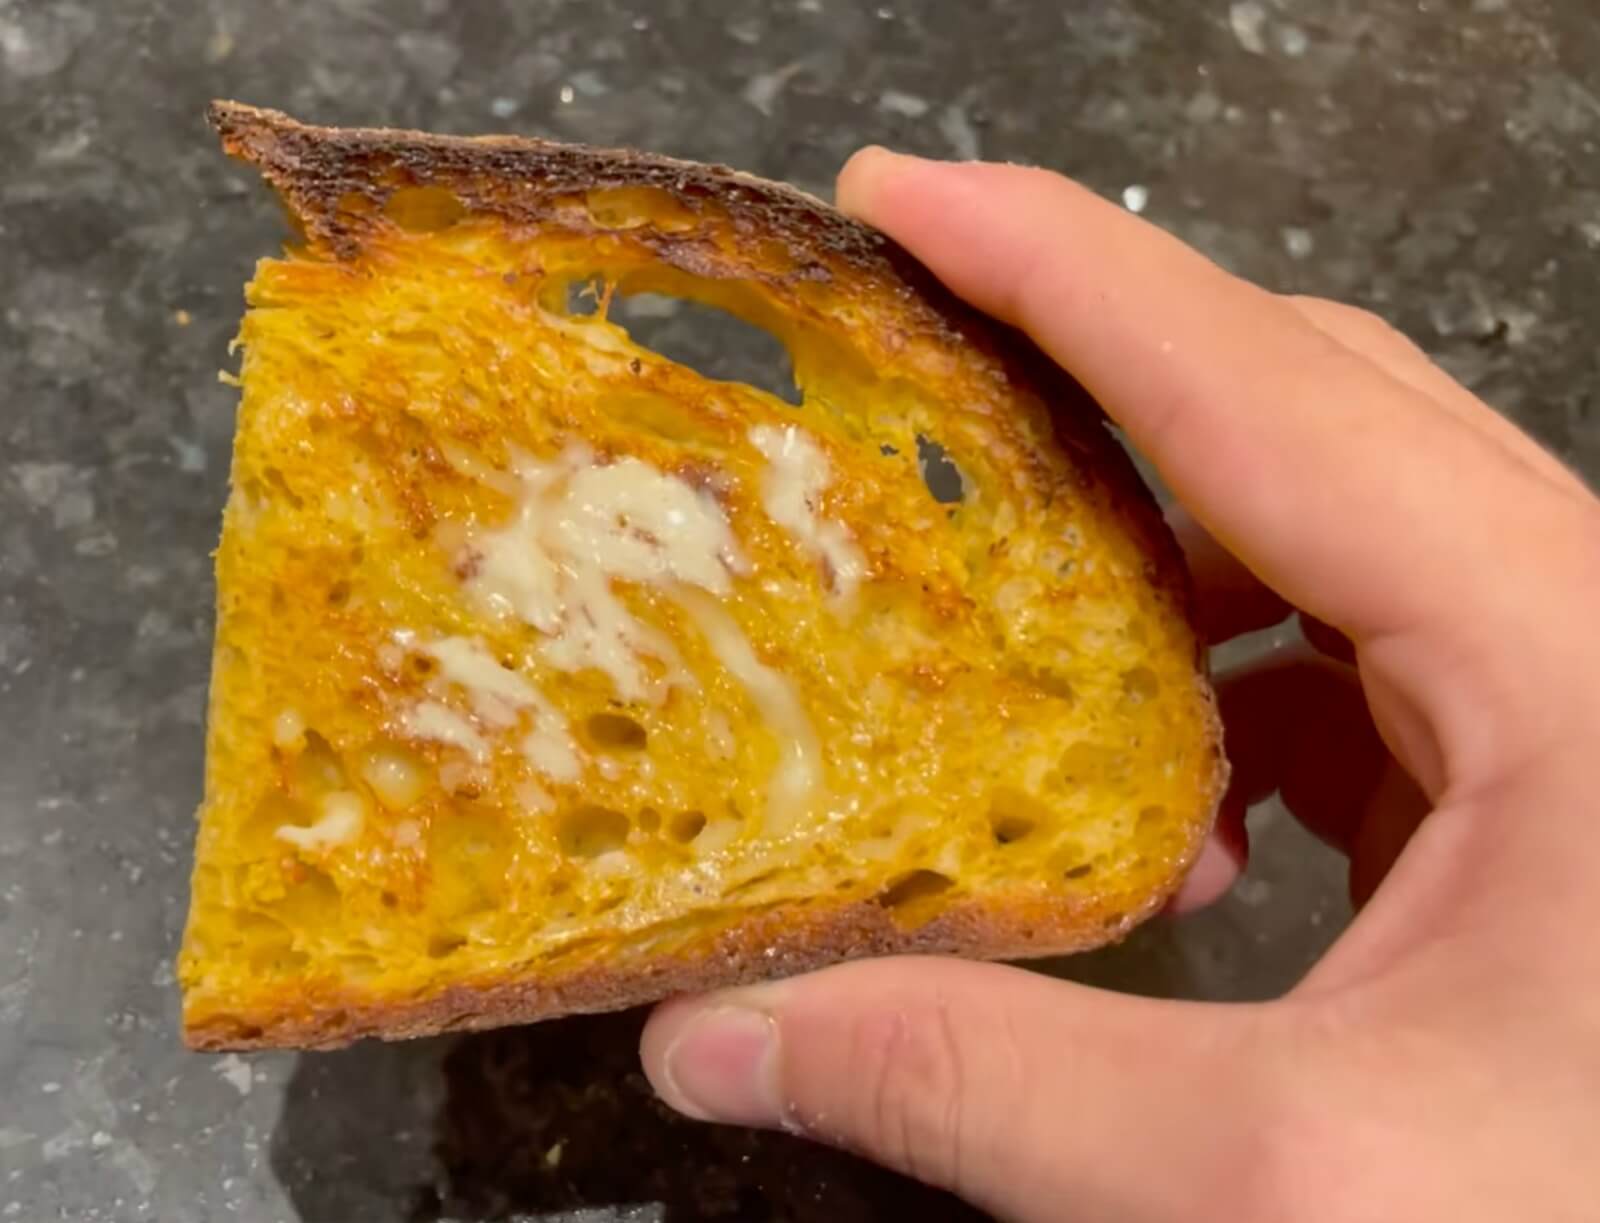
My first slice is going in the toaster with salted butter.
The pumpkin flavor is mild, and this isn’t a sweet pumpkin loaf, so it can go in either a savory or sweeter direction.
Cream cheese works for breakfast. Honey or maple butter can make a slice feel more autumnal. Thick slices are also good alongside soup when you want something warm for dinner.
If a few slices survive until the next morning, I’d toast them again or turn them into French toast.
You don’t need much, though. Warm pumpkin sourdough and melting butter are hard to beat.
How I Store the Leftovers
I wait until the loaf is completely cool before putting it away.
If I expect to eat it soon, I keep it covered at room temperature and slice it as I need it rather than cutting the whole loaf at once.
For a loaf I won’t finish soon, I like freezing individual slices. That way I can take out one or two pieces when I want toast instead of dealing with the whole loaf.
And once the crust has lost that just-baked texture, I stop trying to recreate day-one bread.
I toast it.
Can I Use Canned Pumpkin Purée?
Yes. Canned pumpkin works in this recipe.
Use pumpkin purée rather than a sweetened, spiced pie mixture. Take a quick look at the consistency before mixing, then judge whether the dough needs a small adjustment after everything has come together.
Can I Skip the Whole Wheat Flour?
Yes.
Replace the 50 grams of whole wheat flour with another 50 grams of bread flour. You’ll use 450 grams of bread flour in total.
I like the slight nuttiness from whole wheat here, but I wouldn’t buy an entire bag just for this loaf if bread flour is what you already have.
Why Is My Pumpkin Sourdough Dough So Sticky?
Give it time before adding more flour.
Let it rest for 30 minutes and work through the folds. The dough should become smoother and stronger as you go.
If it remains unusually wet after that, make a small flour adjustment rather than adding a large amount at once.
Can I Proof Pumpkin Sourdough Overnight?
Yes.
Shape the loaf, put it seam-side up in the floured banneton, cover it and refrigerate it overnight.
It’s the route I’d use when I don’t want sourdough deciding what time I go to bed.
Does Pumpkin Sourdough Taste Like Pumpkin Pie?
No, not this loaf.
There’s no pumpkin pie spice, cinnamon or added sugar in the dough.
Think of it as sourdough with a mild pumpkin character and orange crumb rather than a sweet pumpkin bread. That’s why I’m just as happy serving it beside soup as I am eating it toasted for breakfast.
How Do I Know When Pumpkin Sourdough Is Ready to Bake?
For the room-temperature proof, look for a loaf that has become fuller and has some jiggle when you gently move the basket.
If it still looks tight and barely changed, don’t rush it into the oven simply because your timer went off.
The dough gets the final say.
One Last Slice
This is the kind of fall bread I like because the pumpkin doesn’t turn sourdough into dessert.
You still get the browned crust, chewy crumb and sourdough character, but cutting into the loaf reveals that warm orange middle.
The part I’d carry into the next bake isn’t a number on the timer. It’s the change in the dough.
Feel how much stronger it becomes between the first and third fold. Remember how the properly risen dough looks in the container. Notice how it feels when it’s ready to shape.
Those little observations make the next loaf easier.
As for this one, I’m slicing it thick, putting it in the toaster and adding butter.
Easy Pumpkin Sourdough Bread Recipe
Yield: 1 loaf
Ingredients
- 250 grams water
- 10 grams salt
- 100 grams active sourdough starter
- 200 grams pumpkin purée
- 50 grams whole wheat flour
- 400 grams bread flour
- A little olive oil, for greasing the bulk-rise container
- Rice flour, for dusting the banneton
- Bread flour, for dusting during shaping
Instructions
Take your existing sourdough starter from the refrigerator and feed it with 50 grams water and 50 grams bread flour.
Leave it at room temperature until it has clearly risen and is active. Measure 100 grams of active starter for the dough.
Add 250 grams of water, the salt, active starter and pumpkin purée to a mixing bowl. Stir until the starter and pumpkin are dispersed through the water.
Add the whole wheat flour and bread flour. Mix until no dry pockets of flour remain and you have a shaggy dough.
Cover and rest for 30 minutes.
Complete the first set of stretch and folds. Pull one side of the dough upward, fold it over itself and continue around the bowl until the dough starts resisting.
Cover and rest for 30 minutes.
Complete the second set of stretch and folds. Cover and rest for another 30 minutes.
Complete the third set. The dough should feel smoother and more elastic than it did during the first round.
Lightly grease a clean glass bowl or container with olive oil. Transfer the dough to it and cover.
Let the dough bulk ferment at room temperature until it has grown to roughly 1 1/2 to 2 times its earlier size and looks puffy. This took about five hours for this loaf, but use the dough’s appearance rather than five hours as a fixed deadline.
Turn the dough onto a clean counter. Use your hands or a bench scraper to gently pre-shape it into a round. Let it rest for 30 minutes.
Dust the top lightly with bread flour and flip it over. Gently stretch the dough into a rough square.
Fold the right third into the middle, then the left third into the middle. Roll the dough toward yourself to form an oval loaf. Tuck the ends underneath if needed.
Dust an oval banneton with rice flour. Put the shaped loaf inside seam-side up.
For a same-day loaf, cover and proof at room temperature for about 2 to 3 hours. The loaf used here took about 2 1/2 hours. Look for the dough to become fuller and jiggly.
For an overnight loaf, cover the banneton and refrigerate the shaped dough overnight.
Preheat a Dutch oven at 500°F for 30 minutes. Check your Dutch oven manufacturer’s temperature limit before heating it to 500°F.
Turn the loaf onto a piece of parchment larger than the bread. Brush away excess rice flour.
Use a bread lame or clean razor to make one long score across the dough at a shallow angle.
Carefully lower the loaf into the hot Dutch oven using the parchment.
Cover and bake at 500°F for 20 minutes.
Remove the lid and bake for another 12 to 15 minutes at 500°F, until the crust is browned but still shows some of its orange-gold color.
Move the bread to a wire rack and cool for about one hour before slicing.
Same-Day Option
After shaping, proof the loaf at room temperature until it has visibly risen and looks fuller and jiggly. Then score and bake.
Overnight Option
After shaping, cover the banneton and refrigerate it overnight. Return to the loaf the following day for baking.
Before You Slice
Give the bread about an hour on the cooling rack.
Then cut through that crust and look for the golden-orange crumb.
My first slice is going straight into the toaster with butter.
Also read: